Your homes
Creating character in a new-build kitchen
We know that there’s nothing quite like seeing beautifully finished kitchens and bathrooms in real homes to provide inspiration for your own future interior design projects.
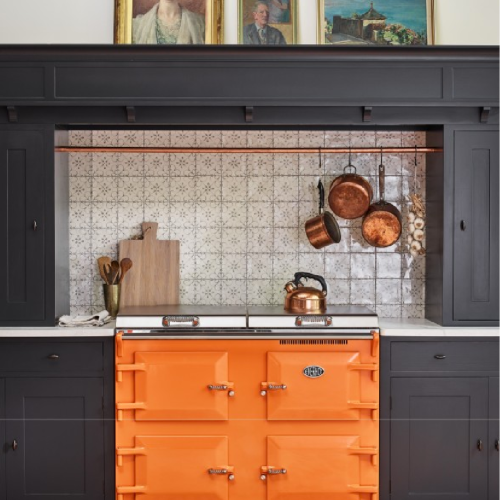
So when we spotted our handmade crackle glazed tiles in this simply stunning kitchen by Kayleigh from @inside_fieldside on Instagram, we couldn’t wait to talk to her and share her project with you.
We sat down with Kayleigh to find out how she went about creating such character in her new-build home, and to get her top tips for handling the ups and downs of home renovations.


Hi Kayleigh! Tell us a little about yourself and your new home...
Well, when the pandemic hit, my partner Stewart, our English Bulldog Murphy and I were living in Salford near Manchester city centre. Like so many people, I began working remotely and as a result, my work and home life became very much blended.
We began to reassess our living situation and decided that ideally we would like a little more space and a rural setting. We started looking in Cheshire and quickly fell in love with a house off-plan, before it was even built! We had a long eight month wait before we were able to collect the keys, and finally moved in March.
A new-build has really suited our busy lifestyle. We couldn’t have committed the time to a full remodel or renovation, so we settled on a new-build with the intention of making some changes to add our stamp.
The kitchen combines white cabinetry with raw wood elements, brushed brass and crackle glaze tiles in Antique White from our Contemporary Classics collection.
Starting with the kitchen?
Yes. We both really enjoy cooking and one of the things we loved most about the property was the kitchen space. It’s open plan, with a dining room and snug area, so we just knew it would become the heart of the home.
But the developer was going to supply a standard spec kitchen, and we quickly realised we wouldn’t be able to remodel the way we wanted. So back in August last year we decided to design a bespoke kitchen instead.
How would you describe your design aesthetic?
I’ve been really enjoying developing my interiors style and would describe it as being quite blended - traditional English country, but incorporating contemporary pieces too.
Much to Stewart’s frustration, I tend to spend a lot of time planning and searching for the perfect item before committing to anything. I believe that your home should reflect you - it should be a collection of things you truly love.
We couldn't agree more! Your kitchen is beautiful. Tell us about the process of designing the space...
I knew quite early on in the process that I wanted the kitchen to be white and brass - it’s such a clean and timeless look. I love the natural patina of brass and to me it feels like a lovely nod to the traditional heritage country kitchen style.
Toward the end of the design process, I started to worry that an all white kitchen might feel a little plain, and decided to use white washed oak across the island cabinetry, along with a vintage rug to bring warmth and texture.


Natural wood elements, handmade tiles and a vintage rug add warmth and texture.
What's your favourite thing about your new kitchen?
That would have to be the area around the Rangemaster. I really wanted to make a feature of that space, and designed the extractor housing to stand out from the white cabinetry in the same white washed oak as the island. Our incredible installation team was able to build it just as I imagined.
When it came to choosing tiles for that space, I felt a plain white subway tile would have been too flat. I knew I wanted something off-white with a little texture to add interest to the back wall, and spent a lot of time online looking for the perfect tile. I came across Marlborough Tiles and ordered a few samples, waiting until the kitchen was fully installed before making the final choice.
The tile I chose in the end is the Contemporary Classics small brick in Antique White. They’re just beautiful and their handmade quality instantly gave the space the warmth that it needed. Their crackle glaze reflects the light really well. We are so pleased with the result!
What was the greatest challenge of the project?
The kitchen work took approximately 5-6 weeks in total, and although the process was enjoyable and our installation team was great, there were definitely some challenging moments!
The sink was actually slightly bigger than we anticipated (and very heavy!) so we had to make a lot of tweaks to the cabinetry to make everything fit. Thankfully though, it all worked out in the end. I must admit, I made myself scarce when the quartz worktop was installed. The peninsula piece weighs more than 200kg!
Do you have any tips for our readers who might be embarking on similar projects?
I would say it’s best to just accept that not everything goes to plan, and that your original design may change.
I’m quite meticulous and would have liked to have had tiles and accessories selected early on. But I’m glad I held on and took the time to ensure that they tied all of the elements together, which they do perfectly!
What’s next?
We’re busy planning the hallway, utility and downstairs powder room. Watch this space!
_____________________________________
Follow Kayleigh’s home decor journey on her Instagram page, @inside_fieldside.
Are you working on a design project that you’d like to see featured on our journal? Simply tag @MarlboroughTiles in your project photographs on Instagram. We can’t wait to see what you’ve been working on.
As featured in…


